
nginx
nginx
- https://www.runoob.com/linux/nginx-install-setup.html
- https://blog.csdn.net/weixin_42167759/article/details/85049546
- https://blog.csdn.net/longgeqiaojie304/article/details/85270836
- https://blog.csdn.net/u012902367/article/details/121980609
- https://blog.csdn.net/qq_55272229/article/details/133304204 (这个讲到如何设置开机启动)
部署
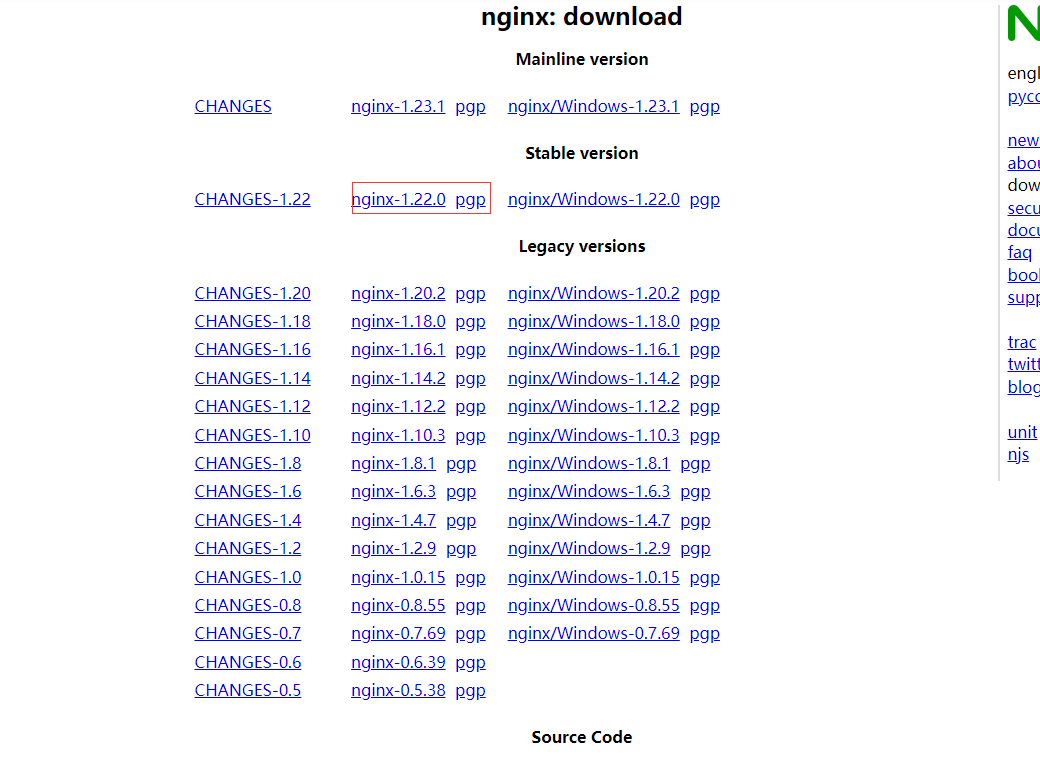
下载地址http://nginx.org/en/download.html
1. nginx 在Linux下部署运行
2种部署方式
- 下载 nginx.tar.gz 安装包
- 通过
wget http://nginx.org/download/nginx-1.22.1.tar.gz
1.1 安装依赖包
## 一键安装上面四个依赖
# 安装gcc
# 安装PCRE pcre-devel
# #安装zlib
# 安装Open SSL
yum -y install gcc zlib zlib-devel pcre pcre-devel openssl openssl-devel
1.2 下载并解压安装包
//创建一个文件夹
mkdir /usr/local/nginx
cd /usr/local/nginx
//下载tar包
wget http://nginx.org/download/nginx-1.13.7.tar.gz
tar -xvf nginx-1.13.7.tar.gz
1.3 安装nginx
这里注意 安装
headers-more-nginx-modulmake报错,应该是版本的问题,应该至少 0.34 版本
## 进入nginx目录
cd /usr/local/nginx
## 进入目录
cd nginx-1.13.7
## 执行命令 考虑到后续安装ssl证书 添加两个模块
./configure --with-http_stub_status_module --with-http_ssl_module


#### 正对 nginx more_clear_headers 报错
## 先执行解压
tar -zxvf /home/software_package/headers-more-nginx-module-0.37.tar.gz
./configure --prefix=/usr/local/nginx --with-http_stub_status_module --with-http_ssl_module --add-module=/home/software_package/headers-more-nginx-module-0.37


## 执行make命令 【仅编译,不安装】
make
## 执行make install命令
make install


make clean
1.4 启动nginx服务
/usr/local/nginx/sbin/nginx -c /usr/local/nginx/conf/nginx.conf
cd /usr/local/nginx/sbin/     #进入nginx安装目录nginx 所在位置
./nginx  启动
./nginx -s stop  停止
./nginx -s quit  安全退出
./nginx -s reload  重新加载配置文件
## 关闭
pkill nginx
kill -9 进程号

ps aux|grep nginx  查看nginx进程
查询进程 ps ajx|grep nginx 存在 master 则表示nginx 正在运行

1.5 重启nginx
/usr/local/nginx/sbin/nginx -s reload
关闭
pkill nginx
1.6. 若想使用外部主机访问nginx,需要关闭服务器防火墙或开放nginx服务端口,端口为上一步nginx.conf的配置端口:
centOS6及以前版本使用命令: systemctl stop iptables.service

centOS7关闭防火墙命令: systemctl stop firewalld.service
关闭防火墙会导致服务器有一定风险,所以建议是单独开放服务端口 :
开放80端口:
firewall-cmd --zone=public --add-port=80/tcp --permanent
查询端口号80 是否开启:
firewall-cmd --query-port=80/tcp
重启防火墙:
firewall-cmd --reload
1.7. 随后访问该ip:端口 即可看到nginx界面。
访问服务器ip查看(备注,由于我监听的仍是80端口,所以ip后面的端口号被省略)

1.8 设置开机自启动nginx
目前2种方式:
- 使用 systemd 服务
- 在rc.local 中配置
一. 使用 systemd 服务
nginx.service 文件一般是在安装 的时候创建在 /usr/lib/systemd/system/中(也即是讲,在安装nginx的时候,只需要执行 sudo systemctl enable nginx 即可设置开机自启,不推荐使用rc.local 中配置的方式)
检查 Nginx 服务状态
sudo systemctl status nginx
确认是开机自启
sudo systemctl is-enabled nginx
如果服务被设置为开机启动,命令将输出 enabled。如果未设置为开机启动,将输出 disabled
设置开机启动
sudo systemctl enable nginx
查看服务状态
sudo systemctl status nginx
使用命令
sudo systemctl start nginx ## 启动
sudo systemctl stop nginx ## 关闭
sudo systemctl restart nginx ## 重启
二. 使用 rc.local (不推荐)
不推荐,因为安装nginx的时候会自动创建 nginx.service文件,这样只需 执行
sudo systemctl enable nginx即可设置开机自启
#编辑
vim /etc/rc.local

#最底部增加这一行
/usr/local/nginx/sbin/nginx
ll查看下rc.local文件,如果不是绿色表示没有执行权限,则执行指令chmod +x /etc/rc.local
解决CentOS7 服务器的 rc.local脚本开机不自动执行 ===》 给 rc.local文件授予可执行权限
## 授权
chmod +x /etc/rc.d/rc.local

## 查看启动情况
systemctl status rc-local.service
## 重启
sudo systemctl restart rc-local.service
1.9 补充命令
查看帮助信息
cd /usr/local/nginx/sbin

./ngxin -h
查看安装时配置
cd /usr/local/nginx/sbin

./nginx -V
查看配置文件是否正确
cd /usr/local/nginx/sbin

./nginx -t
1.10 nginx 不显示目录和版本号
## 不显示目录
autoindex off;
## 确认一下 web端的访问是否有nginx版本信息
http {
    ...其它配置
    server_tokens off;
}
server {
			listen       18081;
			server_name  localhost;
			server_tokens off; ## 不显示nginx版本
			#配置跨域
			add_header Access-Control-Allow-Origin *;
			add_header Access-Control-Allow-Methods GET,POST,OPTIONS;
			add_header Access-Control-Allow-Headers X-Requested-With;

			location / {
				more_clear_headers "X-Powered-By";
				more_clear_headers "Server";
				more_clear_headers "ETag";
				more_clear_headers "Connection";
				more_clear_headers "Date";
				more_clear_headers "Accept-Ranges";
				more_clear_headers "Last-Modified";
				more_clear_headers "X-Content-Type-Options";
				more_clear_headers "X-Frame-Options";
				more_clear_headers "X-XSS-Protection";
				if ($cookie_Admin-Token = ''){
					return 401;
				}
				#代理本地文件夹
				root   /home/yjwyy/file/uploadPath/;
				autoindex off;  ## 不显示目录
				#root   html;
				#index  init_app_db.sql;
			}
		}
headers-more-nginx-module模块的使用
https://github.com/openresty/headers-more-nginx-module/tags
2. windows下载地址
2.1 windows下载地址

2.2. 解压到本地 配置环境变量
D:\software\nginx-1.20.1

2.3 验证是否安装成功
cmd --> nginx -v
2.4 是否启动成功
nginx.conf 中配置的 server 浏览器 192.168.4.3:9090
server {
        listen       9090;
        server_name  192.168.4.3;

}
注 说明,可以直接通过 nginx.exe启动, 是没有cmd 命令窗口的,页面会闪一下,通过浏览器 访问:192.168.4.3:9090 来验证
使用,常用命令
启动:``
重启:
nginx.exe -s reload杀死进程:
taskkill /f /t /im nginx.exe
报错
1. Unknown lvalue 'ExecQuit' in section 'Service'
[/usr/lib/systemd/system/nginx.service:11] Unknown lvalue 'ExecQuit' in section 'Service'
这意味着在 nginx.service 文件的 Service 部分有一个未知的配置项 ExecQuit。ExecQuit 通常用于旧版本的 SysVinit 脚本,而不是 systemd 服务文件。
编辑 nginx.service 文件: 打开 nginx.service 文件并检查 ExecQuit 配置项。
sudo nano /usr/lib/systemd/system/nginx.service
找到并删除或修改 ExecQuit: 找到包含 ExecQuit 的行并删除或注释掉它。
示例:
   [Service]
   ExecStart=/usr/sbin/nginx -g 'daemon on;'
   # ExecQuit=/path/to/signal-handler
重新加载 systemd 配置: 保存文件后,重新加载 systemd 配置。
sudo systemctl daemon-reload
重新启动 Nginx 服务:
sudo systemctl restart nginx
检查 Nginx 服务状态: 确认 Nginx 服务已成功启动。
sudo systemctl status nginx
使用 针对 nginx.conf 配置文件
- 监听服务名
location /XJB/ {}
worker_processes  1;

#error_log  logs/error.log;
#error_log  logs/error.log  notice;
#error_log  logs/error.log  info;

#pid        logs/nginx.pid;


events {
    worker_connections  1024;
}


http {
    include       mime.types;
    default_type  application/octet-stream;
	client_body_temp_path temp/client_body_temp;
    proxy_temp_path temp/proxy_temp;
    fastcgi_temp_path temp/fastcgi_temp;

    #log_format  main  '$remote_addr - $remote_user [$time_local] "$request" '
    #                  '$status $body_bytes_sent "$http_referer" '
    #                  '"$http_user_agent" "$http_x_forwarded_for"';

    #access_log  logs/access.log  main;

    sendfile        on;
    #tcp_nopush     on;

    #keepalive_timeout  0;
    keepalive_timeout  65;

    #gzip  on;

    server {
        listen       9090; // 通过 172.16.10.244:9090 访问 可以判读是否启动
        server_name  172.16.10.244;
		add_header Access-Control-Allow-Origin *;
		add_header Access-Control-Allow-Methods 'GET,POST';
		add_header Access-Control-Allow-Headers 'DNT,X-Mx-ReqToken,Keep-Alive,User-Agent,X-Requested-With,If-Modified-Since,Cache-Control,Content-Type,Authorization';

        #charset koi8-r;
        #access_log  logs/host.access.log  main;

		location /sdbd-web/ {
            root   html;
            index  index.html index.htm;
			proxy_pass http://172.16.10.218:11540/sdbd-web/; #请求转向应用部署的服务器及端口 定义的服务器列表
        }
		location /sdbd-api/ {
            root   html;
            index  index.html index.htm;
			proxy_pass http://172.16.10.218:11540/sdbd-api/; #请求转向应用部署的服务器及端口 定义的服务器列表
        }
		location /XJB/ {
		    port_in_redirect off;
            root   html;
            index  index.html index.htm;
			proxy_pass http://172.16.10.218:9393/XJB/; #请求转向应用部署的服务器及端口 定义的服务器列表
        }
    }

}
说明:初始访问地址 http://172.16.10.218:11540/sdbd-web/app/arcgisMap/index
但是页面存在 不通模块的跳转,会出现跨域问题,尤其iframe实现单点登陆,导致页面试终被拦截,所以使用了nginx 来解决跨域
具体实现
在 172.16.10.244 服务器上 启动了一个 nginx 监听端口 9090
然后配置 location sdbd-web 这样就将原来的访问 http://172.16.10.218:11540/sdbd-web/app/arcgisMap/index --> 转为 http://172.16.10.244:9090/sdbd-web/app/arcgisMap/arcgisMapIndex
将项目中各个模块的跳转IP 端口改为 172.16.10.244:9090
本来集控中心 跳转需要单点登陆,但是通过iframe会被拦截
原来:showTowerPopup('http://172.16.10.218:9393/XJB/sso/jkzx?from=jkzx&token=ahsbd@');
**改为:**showTowerPopup('http://172.16.10.244:9090/XJB/sso/jkzx?from=jkzx&token=ahsbd@');
这样就解决了跨域问题
访问静态资源
D:\home\yjwyy\file\uploadPath\geojson_data\ 文件位置
server {
        listen       1889;
        server_name  192.168.4.24;

        location / {
            root   html;
            index  index.html index.htm;
        }
		location /geojson_data/ {
            #root   D:/home/yjwyy/file/uploadPath/;
            alias	D:\home\yjwyy\file\uploadPath/geojson_data/;
        }
}
Nginx指定文件路径有两种方式root和alias,这两者的用法区别在于对URI的处理方法不同。
location /folder/ {
	root         D:/workspace;
}
location /folder/ {
    alias	D:/workspace;
}
(1)alias是一个目录别名的定义,root则是最上层目录的定义。
例如:上文,使用root 访问geojson_data 则 其会到 D:/workspace/geojson_data/ 目录下去找
使用alias:则会到 D:/workspace 目录下查找
(2)还有一个重要的区别是alias后面必须要用“/”结束,否则会找不到文件的。而root则可有可无。
- 监听端口
server{}
tcp_nopush on;
gzip on;
gzip_min_length 1k;
gzip_buffers 4 16k;
gzip_http_version 1.0;
gzip_comp_level 2;
gzip_types text/plain application/x-javascript text/css application/xml;
gzip_vary on;
upstream  prod-api-server{
   server 192.168.3.30:9060 weight=1 max_fails=5 fail_timeout=30s;
   #server 192.168.3.104:8081 weight=1 max_fails=5 fail_timeout=30s;
   #server 192.168.3.54:8081 weight=1 max_fails=5 fail_timeout=30s;
 }
upstream  prod-api-server-gdzjpt{
   server 192.168.3.30:9700 weight=1 max_fails=5 fail_timeout=30s;
 }
server {
    listen       9090;
    listen  [::]:9090;
    server_name  localhost;
    proxy_connect_timeout 30;
    proxy_send_timeout 120;
    proxy_read_timeout 120;
    proxy_buffer_size 512k;
    proxy_buffers 32 512k;
    proxy_busy_buffers_size 512k;
    client_max_body_size   200m;
    location / {
      #root   /usr/share/nginx/html;
	  root    /usr/share/nginx/html/zcpt/dist;
       try_files $uri $uri/ /index.html;
       index  index.html index.htm;
    }


	location /dev-api/{
			proxy_set_header Host $http_host;
			proxy_set_header X-Real-IP $remote_addr;
			proxy_set_header REMOTE-HOST $remote_addr;
			proxy_set_header X-Forwarded-For $proxy_add_x_forwarded_for;
			proxy_pass http://prod-api-server/;
	}

        location /stage-api/{
                        proxy_set_header Host $http_host;
                        proxy_set_header X-Real-IP $remote_addr;
                        proxy_set_header REMOTE-HOST $remote_addr;
                        proxy_set_header X-Forwarded-For $proxy_add_x_forwarded_for;
                        proxy_pass http://prod-api-server/;
        }


     	location /upload {
            alias  /root/upload/;
       }

}

server {
    listen       8800;
    listen  [::]:8800;
    server_name  localhost;
    proxy_connect_timeout 30;
    proxy_send_timeout 120;
    proxy_read_timeout 120;
    proxy_buffer_size 512k;
    proxy_buffers 32 512k;
    proxy_busy_buffers_size 512k;
    client_max_body_size   200m;
    location / {
       #root  /oadt/oadt-ui;
 	root   /usr/share/nginx/html/oadt-ui;
       try_files $uri $uri/ /index.html;
       index  index.html index.htm;
    }

    location /vform {
       #root  /oadt/oadt-ui;
 	alias  /usr/share/nginx/html/vform/;
       try_files $uri $uri/ /index.html;
       index  index.html index.htm;
    }

	location /dev-api/{
			proxy_set_header Host $http_host;
			proxy_set_header X-Real-IP $remote_addr;
			proxy_set_header REMOTE-HOST $remote_addr;
			proxy_set_header X-Forwarded-For $proxy_add_x_forwarded_for;
			proxy_pass http://192.168.3.30:8880/;
	}

        location /stage-api/{
                        proxy_set_header Host $http_host;
                        proxy_set_header X-Real-IP $remote_addr;
                        proxy_set_header REMOTE-HOST $remote_addr;
                        proxy_set_header X-Forwarded-For $proxy_add_x_forwarded_for;
                        proxy_pass http://192.168.3.30:8880/;
        }

}


server {
    listen       9792;
    listen  [::]:9792;
    server_name  localhost;
    proxy_connect_timeout 30;
    proxy_send_timeout 120;
    proxy_read_timeout 120;
    proxy_buffer_size 512k;
    proxy_buffers 32 512k;
    proxy_busy_buffers_size 512k;
    client_max_body_size   200m;
    location / {
	  root    /usr/share/nginx/html/screen-map/dist;
       try_files $uri $uri/ /index.html;
       index  index.html index.htm;
    }


 location /gdzjScreen/{
                proxy_set_header Host $http_host;
                proxy_set_header X-Real-IP $remote_addr;
                proxy_set_header REMOTE-HOST $remote_addr;
                proxy_set_header X-Forwarded-For $proxy_add_x_forwarded_for;
                proxy_pass http://192.168.3.30:9700/gdzjScreen/;
        }

	location /upload {
		alias  /root/upload/;
   }

}

server {
    listen       9192;
    listen  [::]:9192;
    server_name  localhost;
    proxy_connect_timeout 30;
    proxy_send_timeout 120;
    proxy_read_timeout 120;
    proxy_buffer_size 512k;
    proxy_buffers 32 512k;
    proxy_busy_buffers_size 512k;
    client_max_body_size   200m;
    gzip on;
    gzip_min_length 1k;
    gzip_comp_level 9;
    gzip_types text/plain text/css text/javascript application/json application/javascript application/x-javascript application/xml;
    gzip_vary on;
    gzip_disable "MSIE [1-6]\.";

    location / {
	  root    /usr/share/nginx/html/jetlinks;
       try_files $uri $uri/ /index.html;
       index  index.html index.htm;
    }


    location ^~/jetlinks/ {
        proxy_pass http://192.168.3.30:8849/;
        proxy_set_header X-Forwarded-Proto $scheme;
        proxy_set_header Host $host:$server_port;
        proxy_set_header X-Real-IP  $remote_addr;
        proxy_set_header X-Forwarded-For $proxy_add_x_forwarded_for;
        proxy_http_version 1.1;
        proxy_set_header Upgrade $http_upgrade;
        proxy_set_header Connection "upgrade";
        proxy_connect_timeout   1;
        proxy_buffering off;
        chunked_transfer_encoding off;
        proxy_cache off;
        proxy_send_timeout      30m;
        proxy_read_timeout      30m;
        client_max_body_size    100m;
    }

}
配置文件
##  配置静态文件目录 分为 root 和 alias 2种方式
location /geojson_data/ {
    root         D:/home/yjwyy/file/uploadPath;
    #alias	D:\home\yjwyy\file\uploadPath/geojson_data/;
}
## 配置 重定向 路径
location /stage-api/ {
    more_clear_headers "X-Powered-By";
    more_clear_headers "Server";
    more_clear_headers "ETag";
    more_clear_headers "Connection";
    more_clear_headers "Date";
    more_clear_headers "Accept-Ranges";
    more_clear_headers "Last-Modified";
    more_clear_headers "X-Content-Type-Options";
    more_clear_headers "X-Frame-Options";
    more_clear_headers "X-XSS-Protection";

    root   html;
    index  index.html index.htm;
    proxy_pass http://192.168.3.30:9090/stage-api/; #请求转向应用部署的服务器及端口 定义的服务器列表
}
location /SDT_ZHST_WEB/ {
    alias /home/SDT_ZHST/YJ_ZHST/dist/;
    index  index.html index.htm;
    try_files $uri $uri/ /SDT_ZHST_WEB/index.html;
}
原始客户端 IP 添加到 HTTP 请求头中
默认转发的时候,会导致服务如果添加IP白名单设置失效,因为都是通过当前nginx服务器所在Ip进行访问的,所以需要 获取到 真实的IP地址
# 物资的接口
location /yjwz/ {
    proxy_pass http://127.0.0.1:8082/;

    # 传递原始客户端 IP
    proxy_set_header X-Real-IP $remote_addr;
    proxy_set_header X-Forwarded-For $proxy_add_x_forwarded_for;
    proxy_set_header X-Forwarded-Proto $scheme;
    proxy_set_header Host $host;
}
设置白名单
location / {
    # 允许特定 IP 访问
    allow 192.168.1.100;
    allow 192.168.1.101;

    # 拒绝其他所有 IP 访问
    deny all;

    # 其他配置
    try_files $uri $uri/ /index.html;
    index index.html index.htm;
}
Nginx 二级(或多级)路径映射配置
Nginx 子路径配置
# 前端项目核心 location 配置
location /项目访问路径/ {  # 如 /uavWeb/、/h5pro/,必须以 / 结尾
    alias   /服务器上项目打包目录/;  # 如 /home/wszf/vue/dist/,必须以 / 结尾
    try_files $uri $uri/ /项目访问路径/index.html;  # 关键:fallback 到项目的 index.html
    index  index.html index.htm;  # 默认首页
    allow all;  # 允许所有访问(避免权限拦截)
}